TronXY X5SA firmware

Update: Still waiting on replacement firmware from TronXY.

TLDR; I messed with the firmware and lost the Z-adjust button on the machine. But I figured out how to manually adjust Z.

Blame me for my upgrading.

The TronXY X5SA uses a F-Mini control board from www.cbd-3d.com. On the cbd-3d website they offer a data download link. That link gets you a windows program that provides details on the various items they make, including firmware updates. Unfortunately, it does not tell you what firmware version is being offered.

I put the firmware update on my micro-SD card and turned the printer on. It made a few beeps which seemed to indicate a firmware upgrade in progress. It rebooted and I made a successful print.

Unfortunately, every print after that has failed because I cannot change the z-offset anymore.

Before the upgrade, v1.4.0RC13m4:

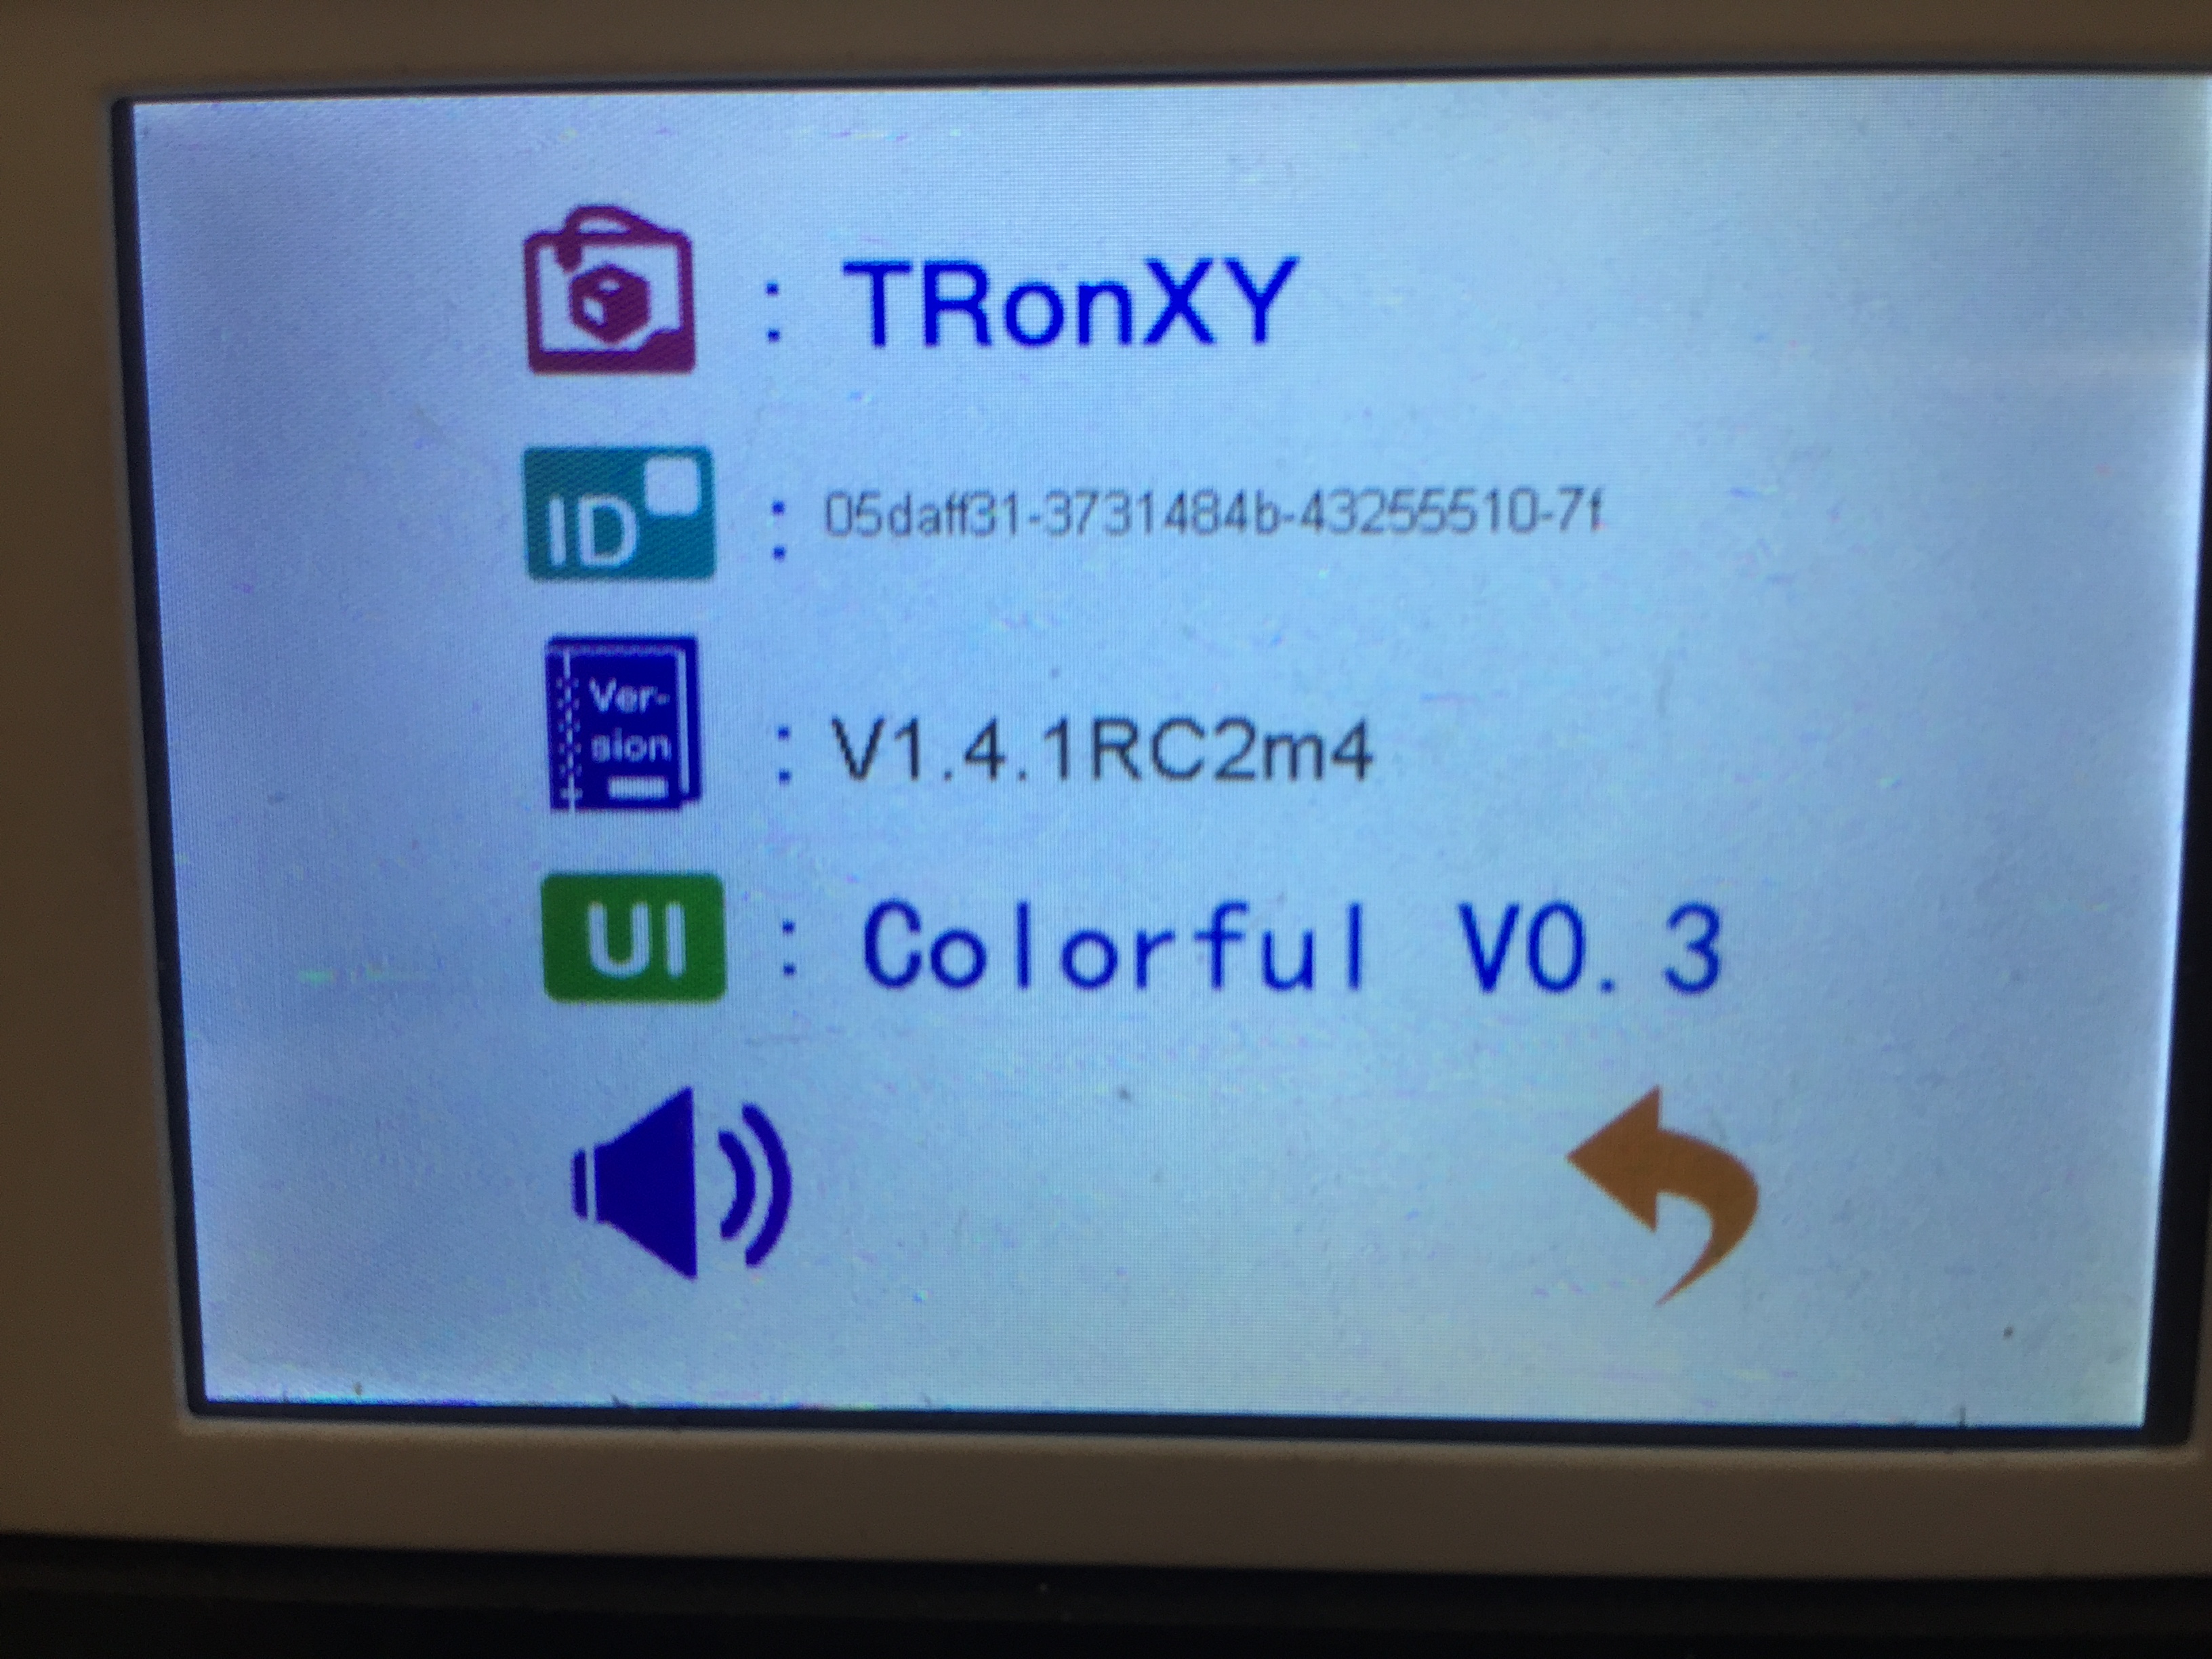
After the upgrade, v1.4.1RC2m4:

:

On the plus side, this new version has a working wifi menu.

On the bad side, pressing the “Z-Offset” button gets me this screen…

With no way to access the z-offset, it’s pretty hard to fine tune the base layer.

*sad MrRobertsScience*

I’ve contacted cbd-3d.com for assistance. I’m hesitant to contact TronXY – they haven’t responded to any of my recent emails.

Update 2/25/2018: I spent some time hooked up to the printer through TTL/USB  converter and repetier-host. I tried a lot of different g-code commands. Based on the commands that worked and those that didn’t, I’m fairly certain this is not a rip-off of marlin, smoothie ware, or reprapfirmware (what Duet uses).

I left the printer running … the first half of the print looks amazing- we’ll see if it finishes properly.

Update #2 2/25/2018: Heard back from cbd-3d.com – “The firmware of TronXY is customized, not a generic firmware. If you need to update, you can contact TronXY company and they will handle it.”

Update #3 3/17/2018: Here’s my G-code for changing the Z-offset.

M8084 Z1.5  ; Set Z-Offset to 1.5mm
M8500 ;  Save settings.
G0 Z10; Lower Z axis to prevent crashing during homing.
G28 ; Home Axis
G0 Z0 ; Check for paper tightness

TronXY X5SA Mk3a heatbed fixed!

On my new TronXY X5SA I had been having problems using the whole print surface. If I printing 4 widgets in the center of the bed, they printed great! But try to print 20 widgets spread out over the bed and the results look like a birds nest. 

Last week, I was starting a print and I happened to touch the underside of the printbed. The left side of the printbed was not getting warm! Did I have a defective printbed? Let’s check the wiring.

I have a 12V power supply which means pins 1,2 & 3 need to be connected. But only pins 1 & 2 were wired up! Here’s the fix.

Soldering onto an aluminum pcb is wicked hard. It took two soldering irons totaling 160 watts of power to do this. But now the heatbed warms up on both sides!

New TronXY X5SA! The good and the bad

January 31st, DHL knocked on my door and delivered a small package from Hong Kong. It was a TronXY X5SA 3d printer. I think this was one of the first X5SA in the USA. Overall I’m pretty happy with it, but there are a few problems.

The good:

  • Powder coated metal Z-axis motor mounts. 
    • I read a lot of complaints from people who received their X5S with broken acrylic Z mounts. The metal mounts are quite sturdy. Each bracket has two holes for the smooth rods to fit into. Unfortunately, the holes were drilled the exact size of the rods, then powder coated. Made it hard to fit the rods in, but nothing a little persuasion from a hammer couldn’t fix.
  • 32-bit control board. Chitu F Mini by cbd-3d.com
  • Control board has option of adding filament runout sensor.
  • Auto-Leveling with included inductive sensor.
  • Touch Screen Interface
  • New Mk3a heated bed is 12v/24v capable and warms up quickly
  • External MOSFET for heated bed control.

The bad:

  • Heated bed was miswired.
    • The wiring diagram on the Mk3a heated bed shows that you need to connect terminals 2 & 3 to ground. On my printer, only terminal 2 was connected. That meant only half the heatbed was working. And since the thermistor was on the working half…. it didn’t see anything wrong!
    • This caused small prints near the center of the board to succeed, while larger prints that weren’t on the heated portion of the bed would fail.
    • I fixed this.
  • No documentation of settings or g-code commands accepted. 
  • Bad touchscreen interface. Let’s hope this is addressed in a firmware update.
  • Z-axis only has one driver.
    • Control boards with two z-axis drivers can perform left-to-right auto-leveling of the heatbed. Currently, if you crash the hotend into the printhead the Z-axis closest to the hotend will stop moving up, and the other side will continue to move, leading to a sloped bed.
  • 32-bit control board is proprietary.
    • Repetier-Host doesn’t recognize it, and I’m unsure what “flavor” of g-code I should have cura produce.
  • No USB on control board.
    • There are 5V TTL pins on the board, so you can buy an add-on module or use a TTL-USB converter
  • No WiFi on control board
    • There is a socket where you can add a special WiFi module
  • No auto resume on power off.