
Hi fellow teachers. I make videos for my students during this online educational experiment called COVID-19. I’m putting out videos 3x a week. You can see my videos on YouTube at: https://www.youtube.com/playlist?list=PLEY79M2-uGLUqcI12ipOEn2fo6PkSkHJx
I’m a big fan of real time video production. Once you start editing videos you can spend forever! I make my videos in one take. If I make a mistake, I just start recording again. That means a 5 minute video takes me about 5-7 minutes to produce. It takes longer to upload the video to YouTube.
Here’s how I make my videos. My setup is Mac based. Most things I mention work on Windows as well.
Equipment:
- Software:
- OBS:
- I use software called OBS (Open Broadcast Studio). This software was developed for streamers – think people streaming games online for others to watch – but is super versatile for any real time video production.
- FYI: There are tons of OBS tutorials on YouTube. I particularly like the videos by EposVox.
- After Effects:
- I use this to make the background animations for my videos. Essential? Nope! Useful? Sure!
- OBS:
- Hardware:
- GoPro Hero 6
- Webcams are alright, but their quality is never great. I already had a GoPro Hero 6 to use as a video camera with a HDMI output (important for next product). Start with your webcam, then if you want, look into upgrading.
- Elgato CamLink 4k
- The best way to hook a camera to your computer is with a HDMI input device. The CamLink 4k is the standard for streaming and works with both Mac’s and PC’s. Like a lot of streaming hardware, it is sold out during the COVID pandemic.
- Background
- For my videos I like to make my background disappear. I feel that makes for a more professional looking video.
- The easiest way to remove a background is with Chroma Keying. Basically, the computer removes the color green. OBS has a built in Chroma Key filter.
- I make my green backdrop during the early days of the pandemic lock-down by going to Walmart and buying 6 yards of 44″ Lime Green fabric. I cut the fabric into three identical vertical panels, and sewed them together into a 6ft x 10ft backdrop. Jo-Ann Fabrics is now open again, so look for what’s on sale or use their ever present 40% off coupons.
- As of 4/25/2020 JoAnn had a “Symphony Broadcloth Polyester Blend Fabric Solids” in Lime Green for 2.00 a yard. That’s $12.00 for a backdrop!
- As of 4/25/2020 JoAnn has a “Wide Quilt Cotton Solids” in Fern Green for $9.99 a yard. Use a coupon and that’s $12.00 for a backdrop WITHOUT SEWING
- Another option is “Kona Quilt Cotton Fabric Solids” in Grass Green.
- Home Essentials Lightweight Decor Fabric 45″ Apple
- The real thing: Rose Fabrics sells “128″ Poly Muslin, IFR” in Digital Chroma Green for $17.85 a yard. That means a backdrop is $35 + shipping, but this is an amazing fabric that produces great green screen results with less light.
- Amazon sells backdrop stands, but I was able to use a $3.99 ratcheting tie down strap as my support. It runs from the door in one corner of the room, to a c-clamp on a shelf in the opposite corner of the room. The backdrop is clipped to the strap with 6-8 1/2 clip clamps ($0.49 each).
- Background Lighting
- Video needs light. A background needs a lot of light, especially if you want it to be evenly lit for chroma key.
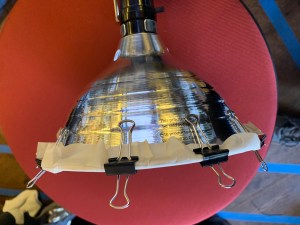
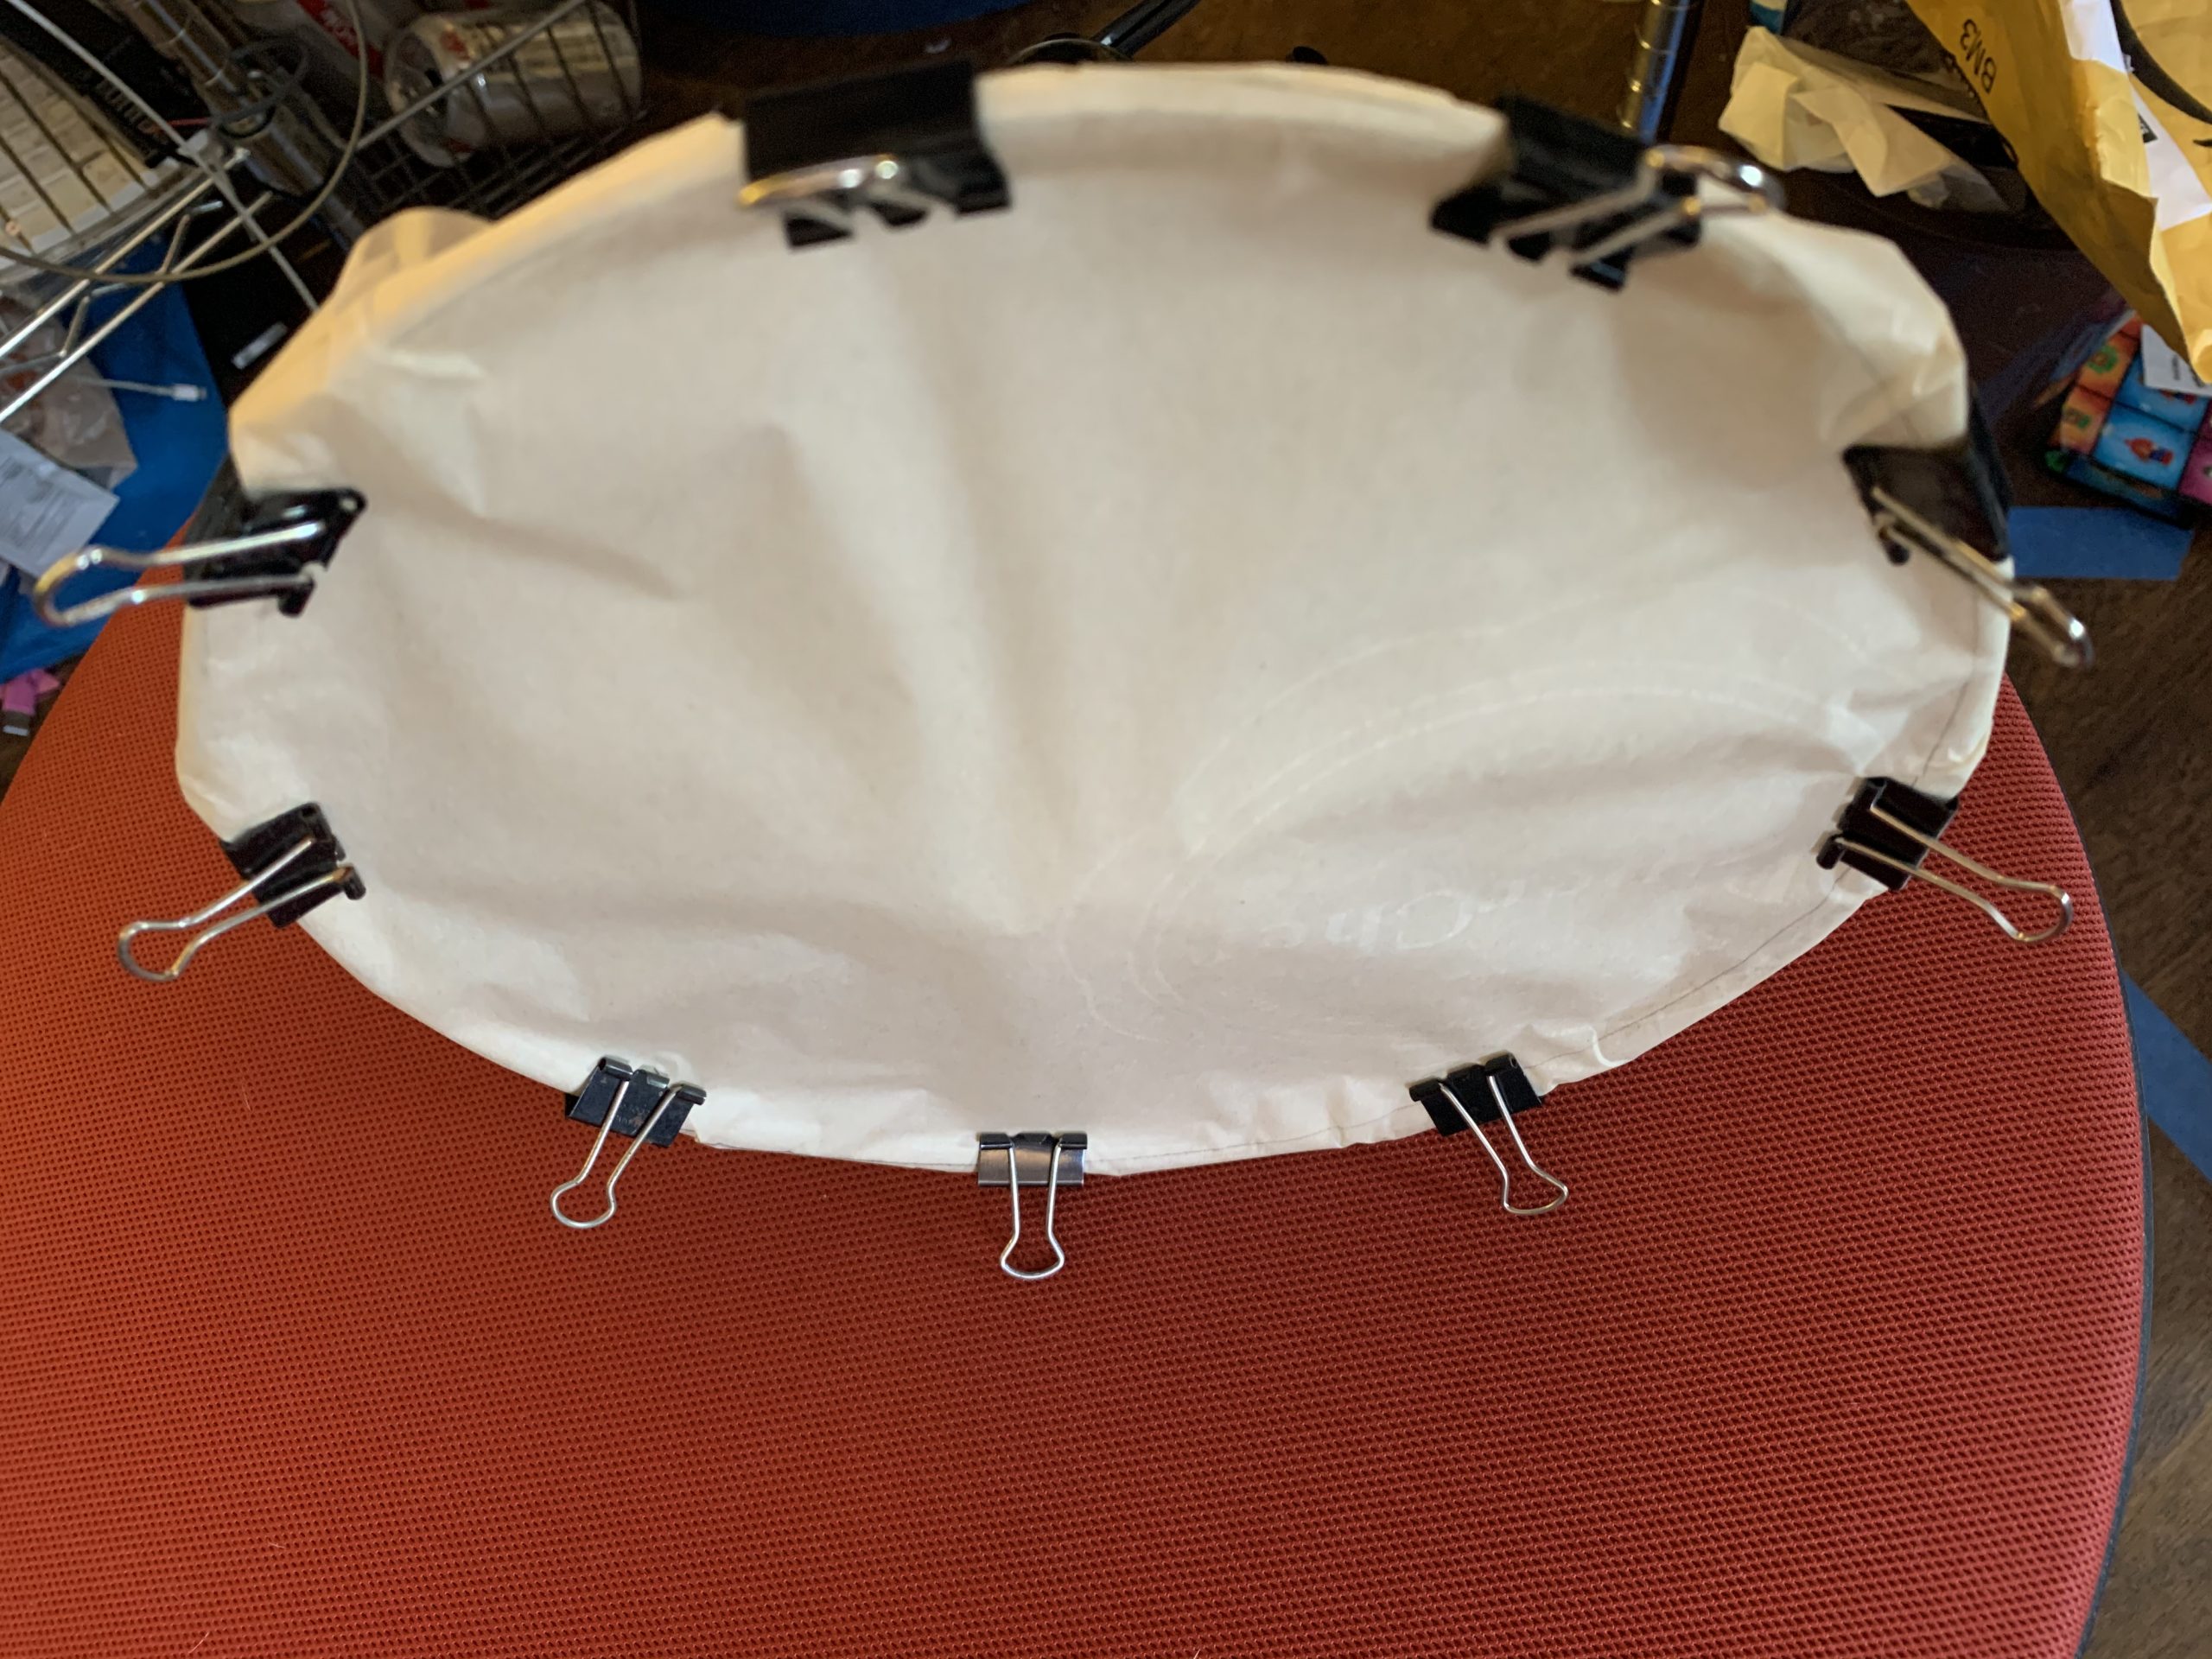
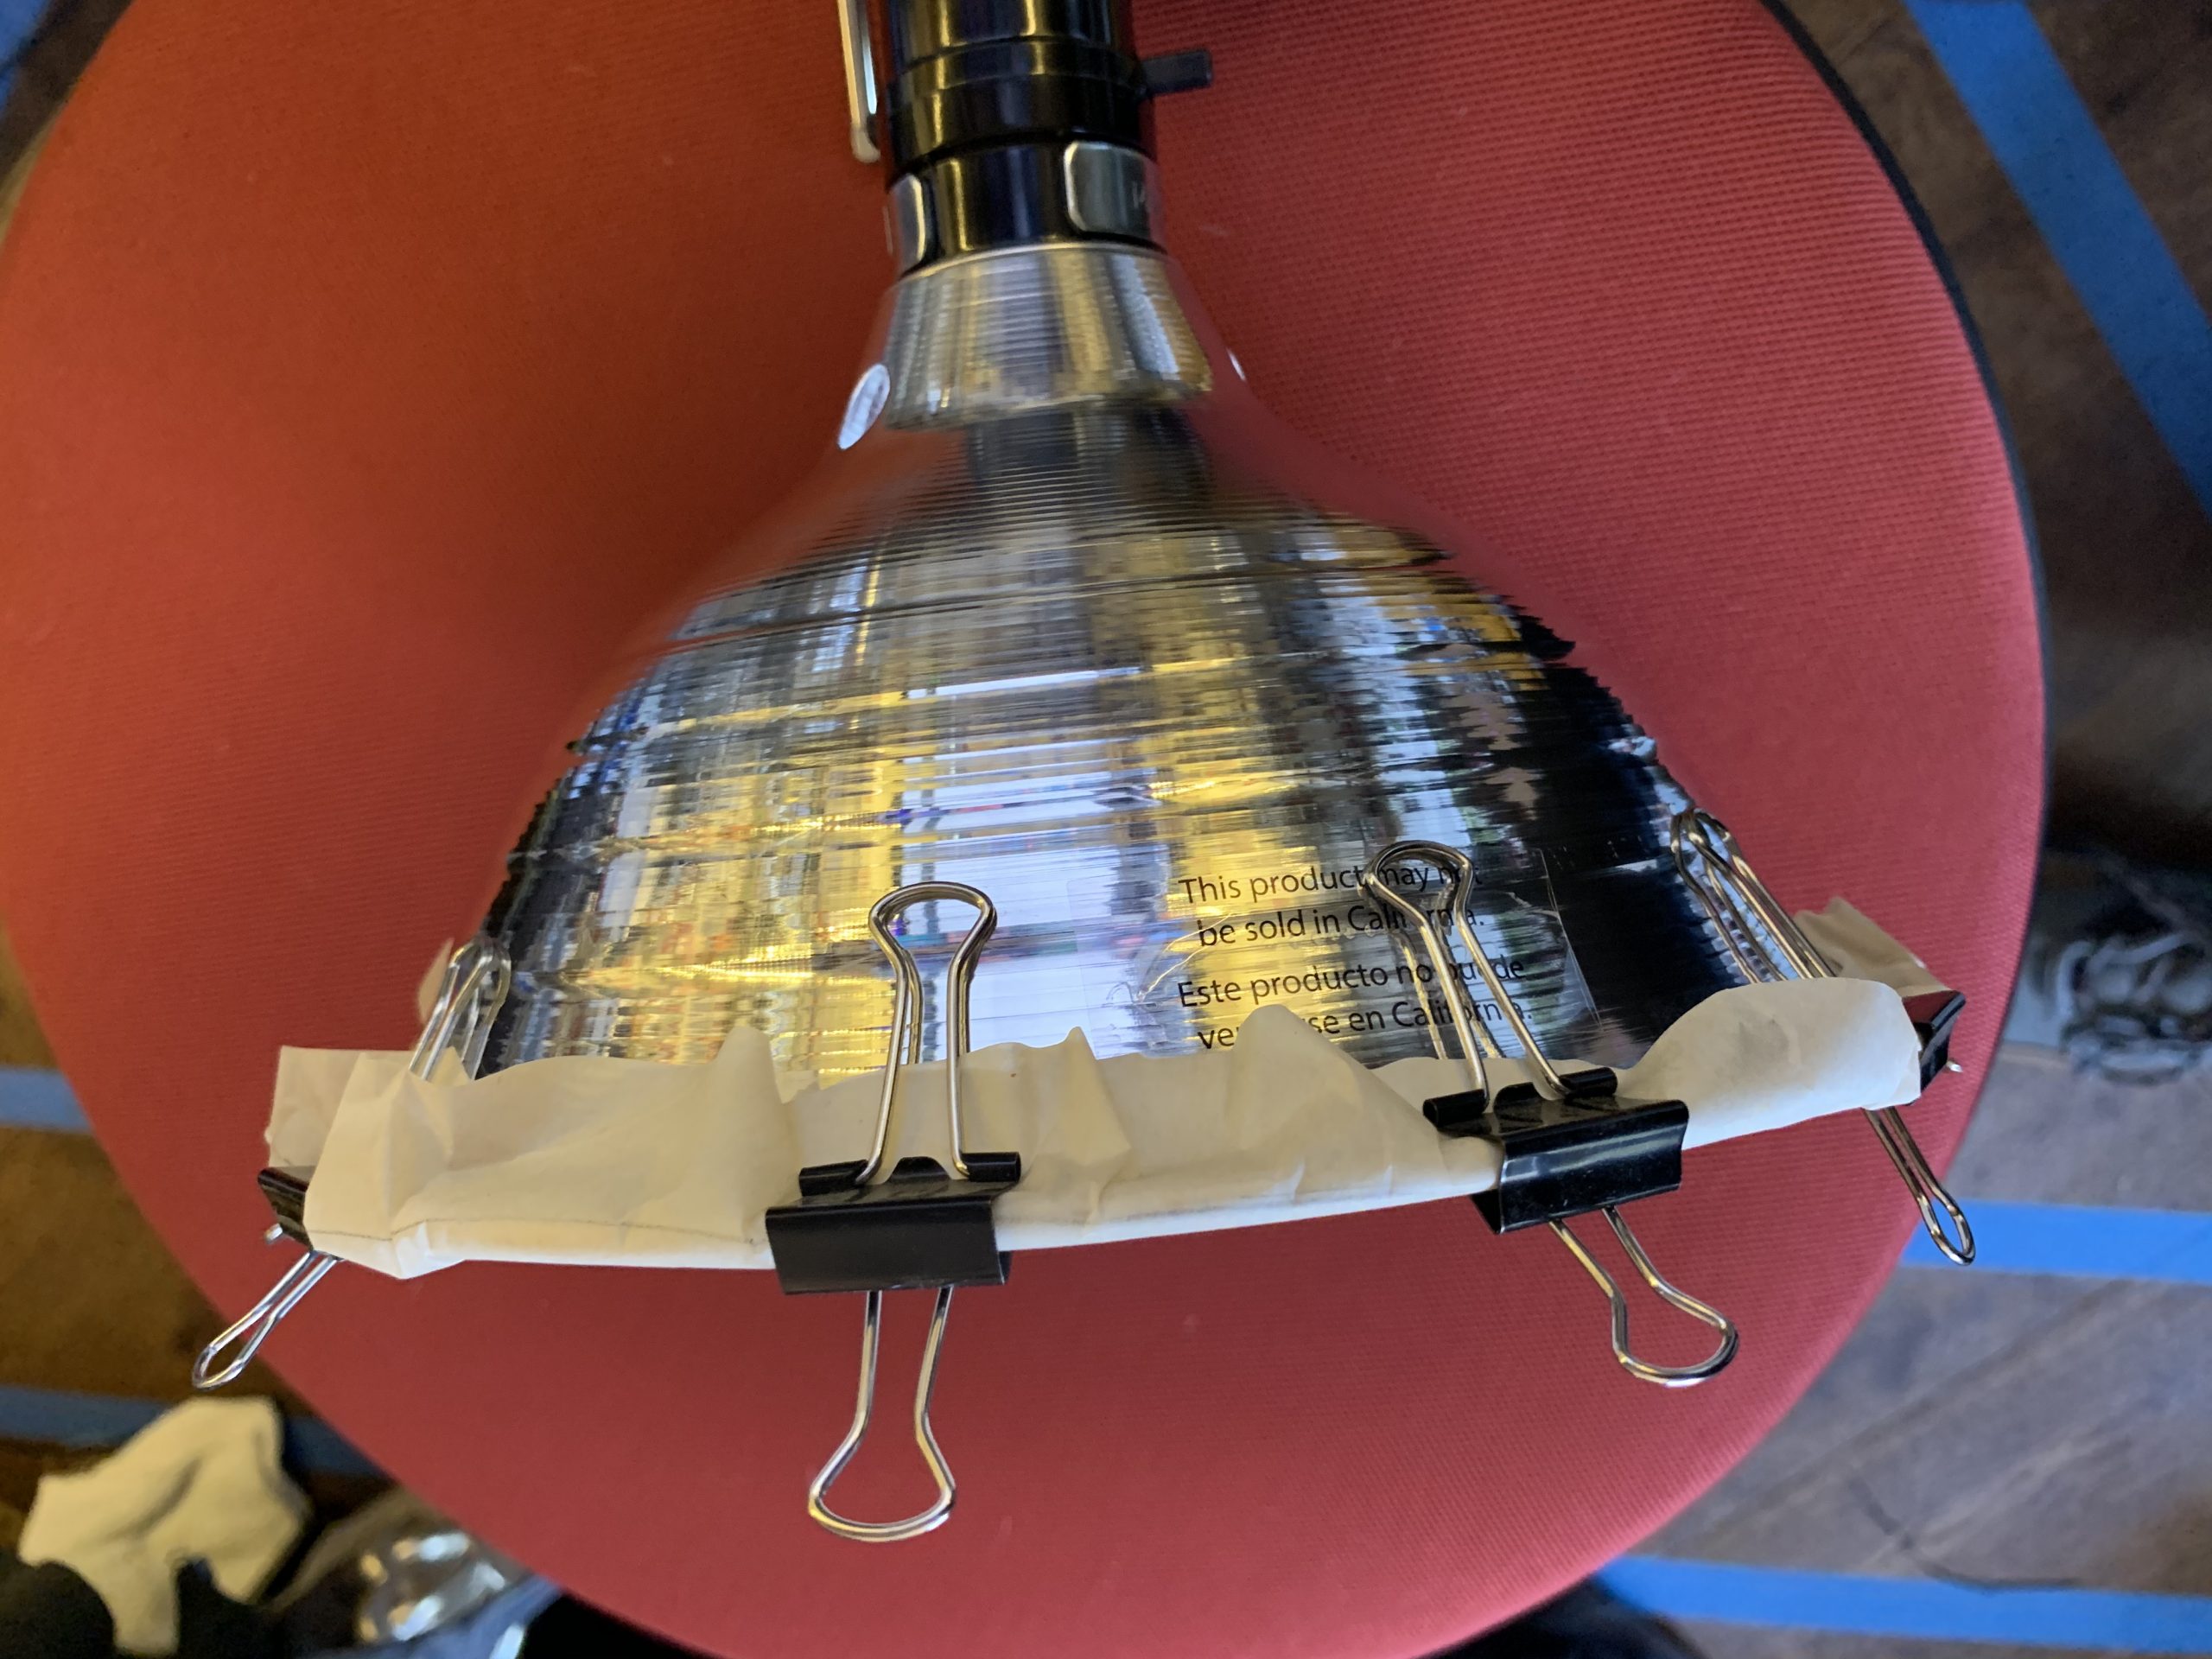
- I use 4 clamp lights from Home Depot with 100W led bulbs.(light fixture & bulb)
- Use mini binder clips to secure parchment paper to the from of the reflector in order to diffuse the light. You can pick up parchment paper at the grocery store (near the aluminum foil) for <$4.00

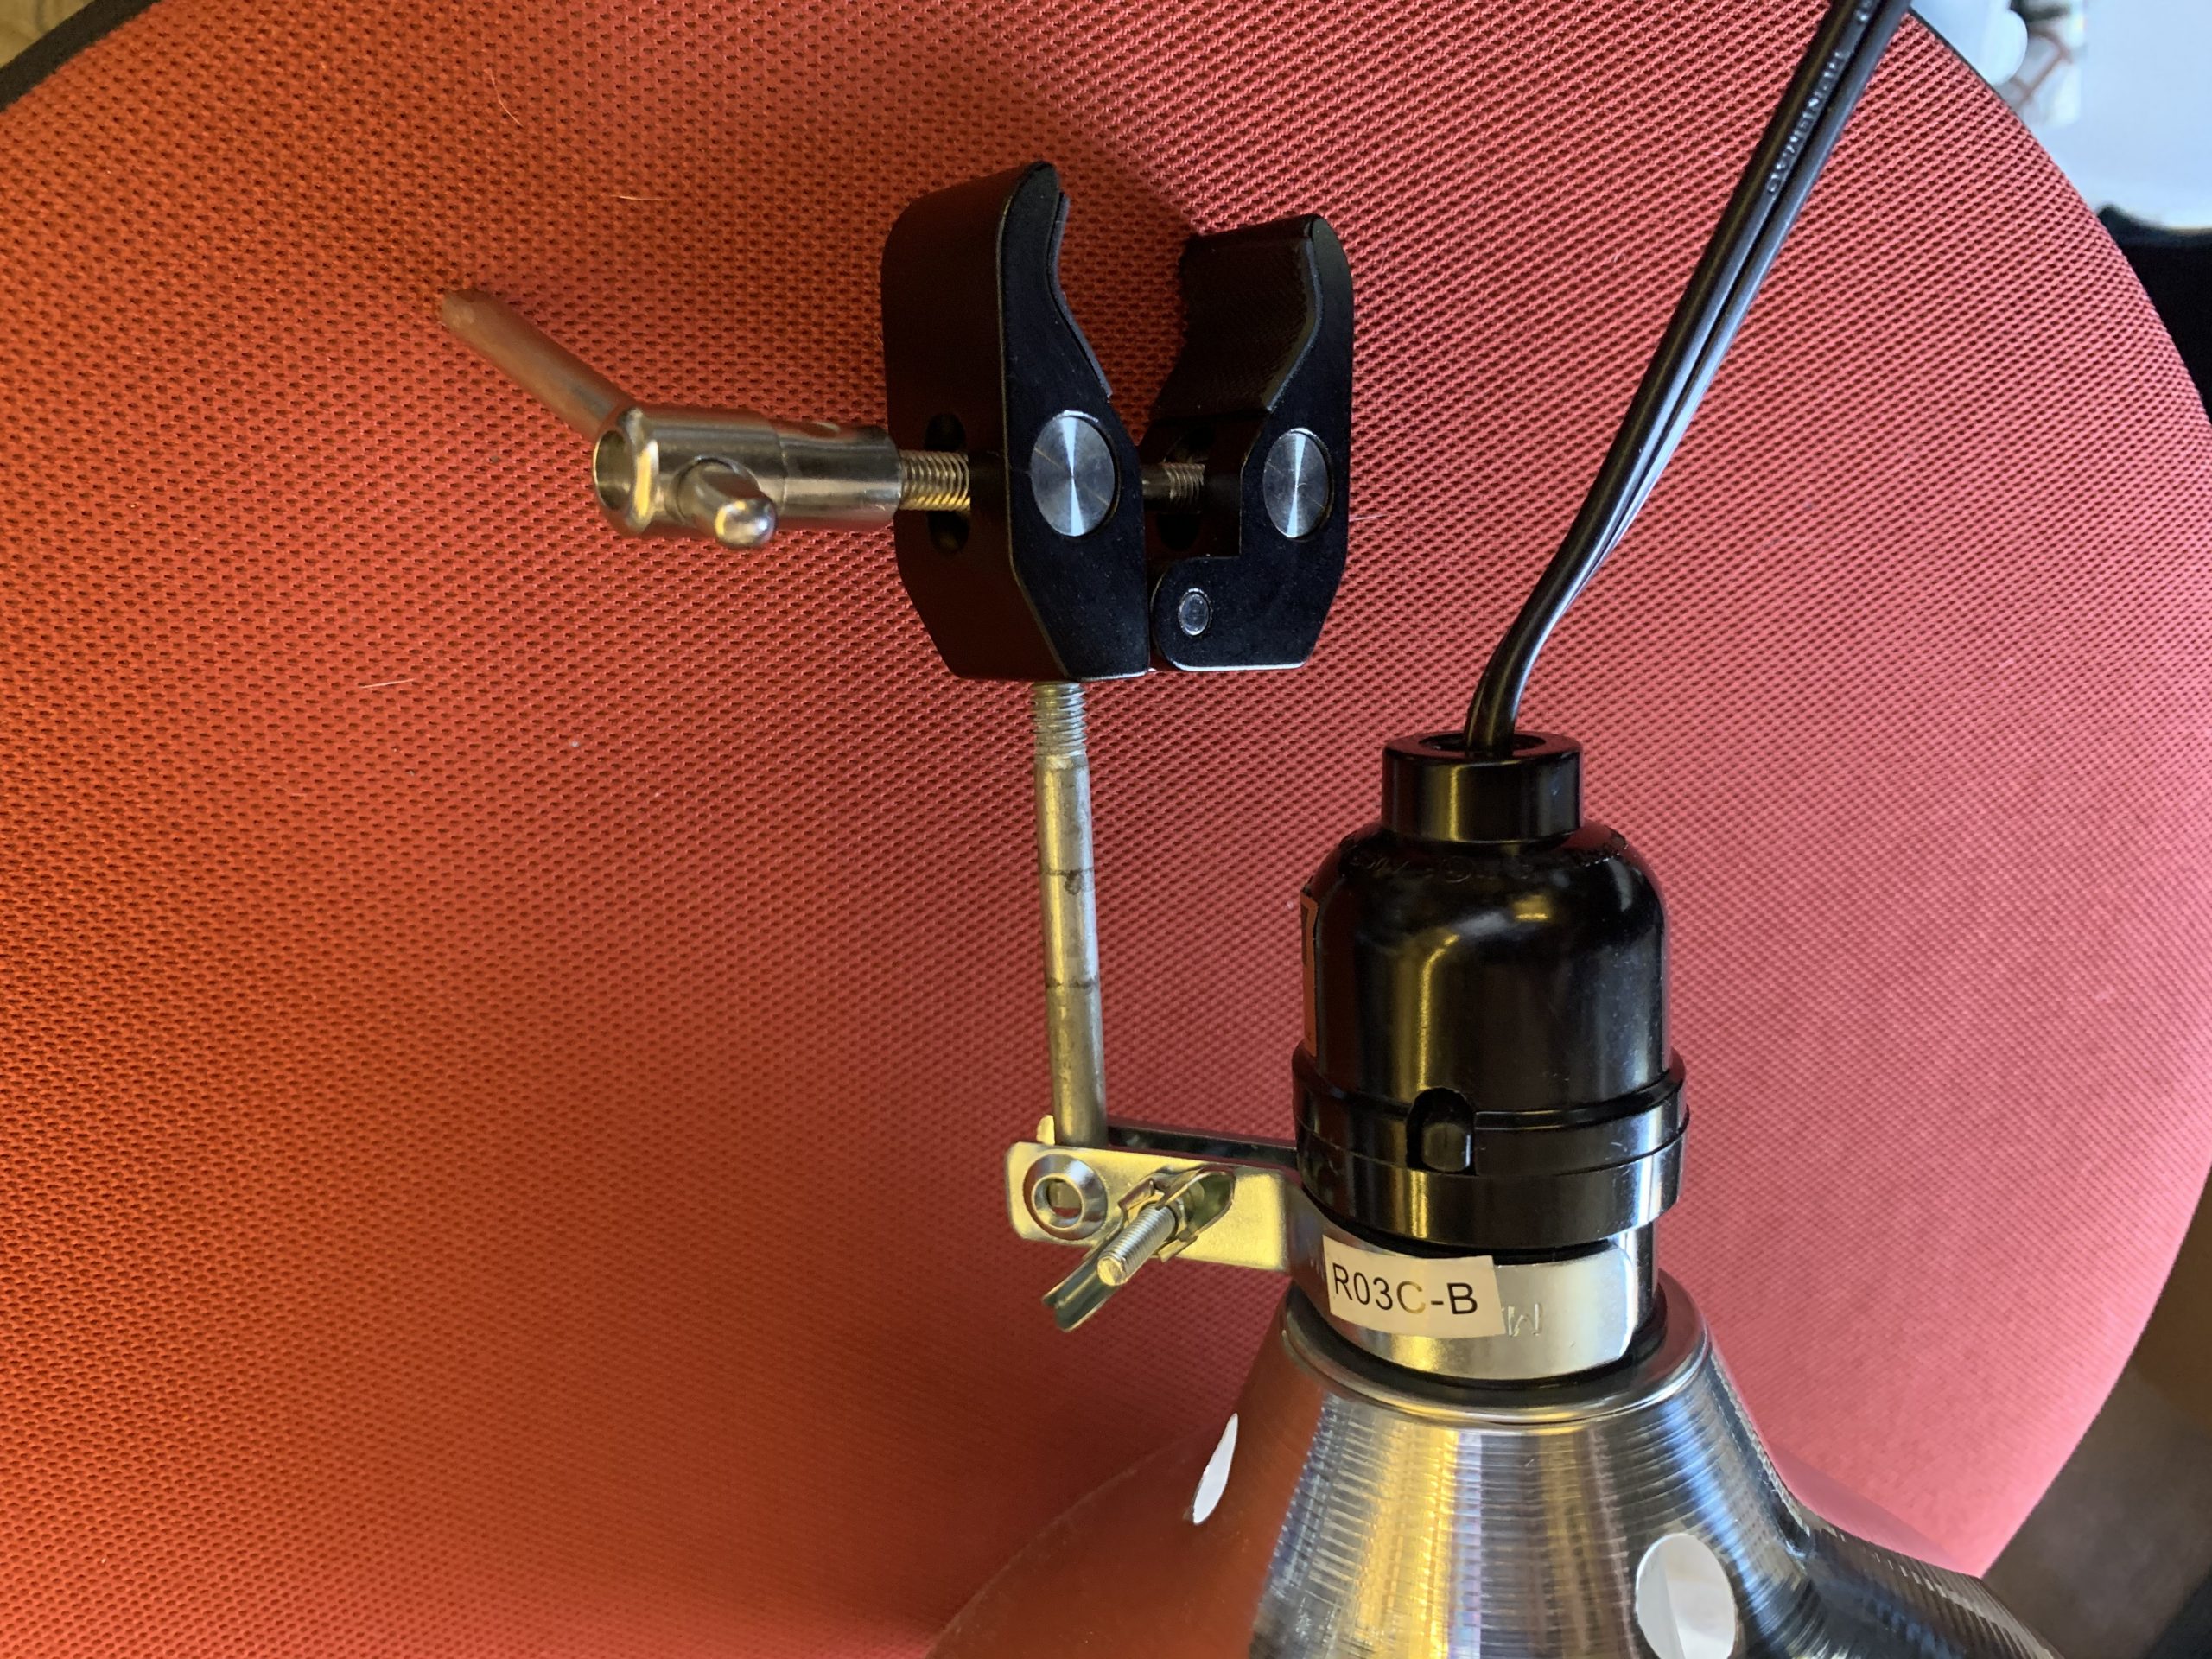
- I replaced the clamp part of the light with a mounting bracket from SmallRig(link) and a 1/4″ bolt. This works for me because my desk is made from Metro shelving and has vertical poles to attach lights to.

- Ring Light for computer (homemade)
- A great way to light for video is a ring light.
- Here’s an explanation of why ring lights are amazing. (https://spectrum-brand.com/blogs/news/what-is-a-ring-light)
- I use my iMac at home when I’m doing video work. So I built a “ring” light that lets me view my screen, and provides enough light.
- My home built light attaches to the front of my Mac with Velcro.
- I did this because once I put up my backdrop, most of the light from my window disappears. And I had the hardware to build a ring light lying around.
- Document Camera
- Want to show document on your videos? You can either use a document camera (I recommend bringing yours home from School if you can) or your smart phone to do this.
- If you want to use your cell phone, you’ll need a stand to hold the phone. You can:
- Get an phone holder like https://www.amazon.com/Gooseneck-Flexible-Cellphone-Rotating-Compatible/dp/B07951WKV6 or https://www.amazon.com/Overhead-Camera-Samsung-Streaming-Lessons/dp/B07PPL1M2T/
- Build a phone holder out of a cardboard box. My least favorite solution – difficult to light the document.
- My sister who is a 3rd grade teacher uses a combination of a selfie stick and a tripod to hold her phone in the right location for using it as a document camera.
- If you want to use your doc camera from school, don’t forget to install the software that comes with it.
- Microphone
- You can use the built in microphone on your computer.
- Do you have AirPods? Connect them to your computer for better audio!
- Even though you’re not in the classroom, use your teaching voice when making videos. Project your voice and your videos will sound better.
- In the classroom, I use a wireless headset. I brought that home and connected that to my computer to get better audio for my videos.
- GoPro Hero 6
Setting things up
OBS can appear complicated when you first see it. But there are lots of tutorials online. Basically, you set up “scenes”, add sources to them, and can switch between scenes. For example: my main scene is called “curriculum”. It has two sources – a window capture and a video capture.
I set the window capture to my Chrome window where my online curriculum is located. The Video capture is my CamLink 4k w/ GoPro Hero 6. I added a “Chroma Key” filter to my video capture to remove the background behind my head.
I could also make a scene called “Document capture” – I would use a window capture to get the document image from the document camera software. I would add a video capture device so my face shows up in the corner of the screen.
I also set up scenes such as “Intro”, “Agenda” and “Credits”. While I’m recording my video, I can click on the different scenes to change what is being displayed.
Recently, a fellow teacher reminded me that when the TV show “Blues Clues” was being developed they did a lot of research onto attention spans. They found 15 seconds was an average attention span. If you watch Blues Clues you’ll see things changing on the screen on a regular basis to keep kids interested. I have a number of different scenes that I can use to try to keep things interesting.
Here are some of my favorite videos about streaming:
TLDR: How to get started
Here’s a quick tutorial to get you started with creating classroom instructional videos with OBS.
- Go to http://obsproject.com
- Click on “Mac OS”.
- Once OBS has downloaded, open the disk image and drag OBS to the application folder.
- Go to your application folder and open OBS
- Do not run the setup wizard.
- At the bottom of the screen you see the interface panel:

- We need to add four scenes. Click the + button below scenes and add the following scenes: “Intro”, “Web”,”Docs”, and “Credits”
- Click on the “Intro” scene and let’s add some sources.
- Click on the + sign below Sources

- Select “Video Capture Device”
- Name your video capture

- Select the FaceTime HD camera on your computer

- Click OK
- Click on the + sign below Sources
- You’re back at the Main OBS interface. Notice you can now see your picture on the screen.

- I think I deserve the full screen, so I grabbed the corner of my image and dragged it until I covered the full screen.

- This makes a good scene for starting your video. This might be where you explain to the students what you are doing today.
- Before we setup the rest of the scenes, let’s add audio.
- Click on Settings.
- In the window that appears, select “Audio”
- Under devices, change “Mic/Auxiliary Audio” to “Built in Microphone” and select OK.

- This adds your audio. Including audio from videos you want to show is a little more difficult and will be addressed later.
-
Setup a web scene.
- Open a browser window and navigate to the web resources you would like to show the students.
- Go back to OBS and select the Web scene.
- Under sources, click on the + and select window capture

- Select the appropriate window, and click OK
- It turns out my window is too big for my video. There are three things I can do. I usually use a combination of methods 1 and 2.
- Resize the window on my computer screen. I.E. go to chrome and grab the corner of the window and make it smaller.
- Crop the window in OBS. In OBS if I hold down the option key while dragging the frame of the window it will crop the window.
- When presenting from a website, I use crop to remove my tabs and the URL bar from the image.
- Resize the window in OBS. In OBS, grab the corner of the window and make it smaller.
- We’re not done. Let’s add my talking head to the corner of the screen.
- Click + under sources and select “Video Capture Device”
- This time, select Add existing and select “FaceTime Cam”

- Now OBS looks like this:

- Let’s move my face, and crop my image.
 c
c - That’s better. If I had a green background, I could add a “Chrome Key” filter to my webcam and remove my background entirely.
-
Setup a document camera scene with a document camera.
- This is really similar to the web scene.
- Go to the “Docs” scene
- Open your document camera software. I’m using an Avermedia F15 with Sphere2 software.
- In OBS, add a window capture source

- Select the application window

- Notice that the document is sideways. There’s a reason for that, and we will fix it momentarily.

- Oops. Let’s crop out the menus.

- And then right click on the image and select “Transform” -> “Rotate 90 degrees CW”

- Click on “Add source” and select previous source “FaceTime HD”
- Voila – you’ve got your document and you on the screen at the same time!

- Set up a document camera scene with a smart phone.
- Software needed:
- For iPhone and iPad:
- https://apps.apple.com/us/app/ndi-hx-camera/id1477266080. It’s free and it lets your iPhone or iPad as a video camera that will transmit over your wifi and OBS can record it.
- For android:
- Unfortunately, the NDI app for Android has gone missing from the Google play store.
- For iPhone and iPad:
- OBS Setup:
- Create a new scene named “iPhone”
- Click the + button next to source and select “NDI Source”
- Give your source a name. I chose “iPhone_NDI”
- In the next dialog box, click on “Source Name” and select your device. You need to be running the NDI HX Camera App for it to show up.

- Select OK.
- Resize the iPhone image
- Crop it
- Add yourself in via webcam – see previous section.
- Software needed:
- Let’s setup our final scene – credits.
- Go to the Credits scene
- click “Add source”
- Select “Text”
- Type in some credits.
- Ready to record?
- Try this out. Click on “Start Recording”. Click on different scenes to change what is being shown. When you’re done, click “Stop Recording”.
- The recording will be stored in your Movies folder when you’re done.
- You’ll be amazed how small the movies are. Easy to upload!


